

Onto real hardware
Your program runs in the emulator. Here are the five ways to get it onto an ACE, in the order most people reach for them.
| Way | You need | Good for |
|---|---|---|
| Memory card | A CompactFlash card and a reader | Everything, most of the time |
| Serial cable | A USB-to-serial adapter | Iterating without moving a card |
| Wozmon paste | Just the cable | Small machine-code experiments |
| EEPROM | A TL866-family programmer | ROM cartridges |
| Flash Helper | An Arduino Mega 2560 and the shield | Flash Carts |
The memory card
Build an image with cffs, write it to the card, put the card in the ACE.
cffs create disk.img --size 1M
cffs add disk.img COUNT.PRG
cffs list disk.img
Created disk.img (1,048,576 bytes, 2,048 sectors, 1 disk)
Added COUNT.PRG to disk 0 of disk.img
Disk 0
Name Size Start Sectors
──────────── ─────── ───── ───────
COUNT.PRG 49 1 1The card's directory holds eight characters plus a three-character extension, and a longer name is refused rather than quietly shortened:
Error: Invalid filename: name part must be 1-8 characters, got "COUNTDOWN"--name renames a file on the way in, so your source tree can call things whatever you like:
cffs add disk.img build/countdown.prg --name COUNT.PRGTry the image before you write it to anything:
6502 run --cf disk.imgDIR
DISK 0
COUNT .PRG 49
LOAD "COUNT.PRG"
RUNThen write disk.img to the card with whatever your operating system uses for disk images (dd, Raspberry Pi Imager, balenaEtcher — it is a raw image, not a filesystem your computer knows). Card in the ACE, and DIR shows the same listing.
A card holds up to 256 of these one-megabyte disks; --disks 32 builds a bigger image, --disk 3 puts a file on a particular one, and DISK 3 on the machine selects it. Storage covers the model from the machine's side.
Keep the image in the build, not in the repository
make cf rebuilds the image from the current program every time. A disk image checked into version control is a 1 MB binary that goes stale immediately.
Over the serial cable
With a terminal already connected — Serial and a terminal sets that up — you can push a program down the wire without touching the card.
On the ACE:
LOAD
XMODEM RX READY
Then start an XModem send in your terminal program and pick your .prg. The machine takes it, and RUN runs it.
Going the other way, SAVE with no filename gives you XMODEM TX READY and you start an XModem receive. That is how you get a listing you wrote at the machine back onto your computer.
You have about a minute to start the transfer before the ACE gives up and returns to the prompt — harmless, just type the command again.
This is the fastest loop for hardware work: edit on your computer, make, send, run, repeat, with the card never leaving the slot.
The Wozmon paste
The crudest path, and the one that needs the least. bin2woz turns your binary into deposit lines:
bin2woz -a 0x0800 build/countdown.prg > countdown.woz0800: 0A 08 0A 00 A5 32 30 36 30 00 00 00 A9 0A 85 40
0810: A5 40 A2 00 20 96 A0 20 93 A0 C6 40 D0 F2 A9 26
0820: A0 08 20 90 A0 60 4C 49 46 54 20 4F 46 46 0D 0A
0830: 00Get to Wozmon — J FF00 from the Monitor's dot prompt, not G, which lands you in a Wozmon that ignores everything you type (The Monitor explains why). Paste the text into your terminal and the bytes go into memory a line at a time. No protocol, no card, nothing to install on the ACE's side.
Don't paste a program you then want to RUN
Wozmon deposits bytes one at a time and has no idea how many arrived. BASIC needs that count: it puts its variables immediately after the program image, and without a length it walks the tokenized line chain instead — which ends at $080C, right on top of your machine code. The first variable your program sets overwrites itself.
LOAD and the Monitor's L both hand BASIC the byte count properly. Use Wozmon for code you'll enter from the Monitor, not for programs you intend to RUN.
If the cable is your only way in, build a raw binary instead — no stub, entry at $0800, started with 800R where it sits. That is what 6502-BIN is for, and the template chapter covers it.
Burning a cartridge
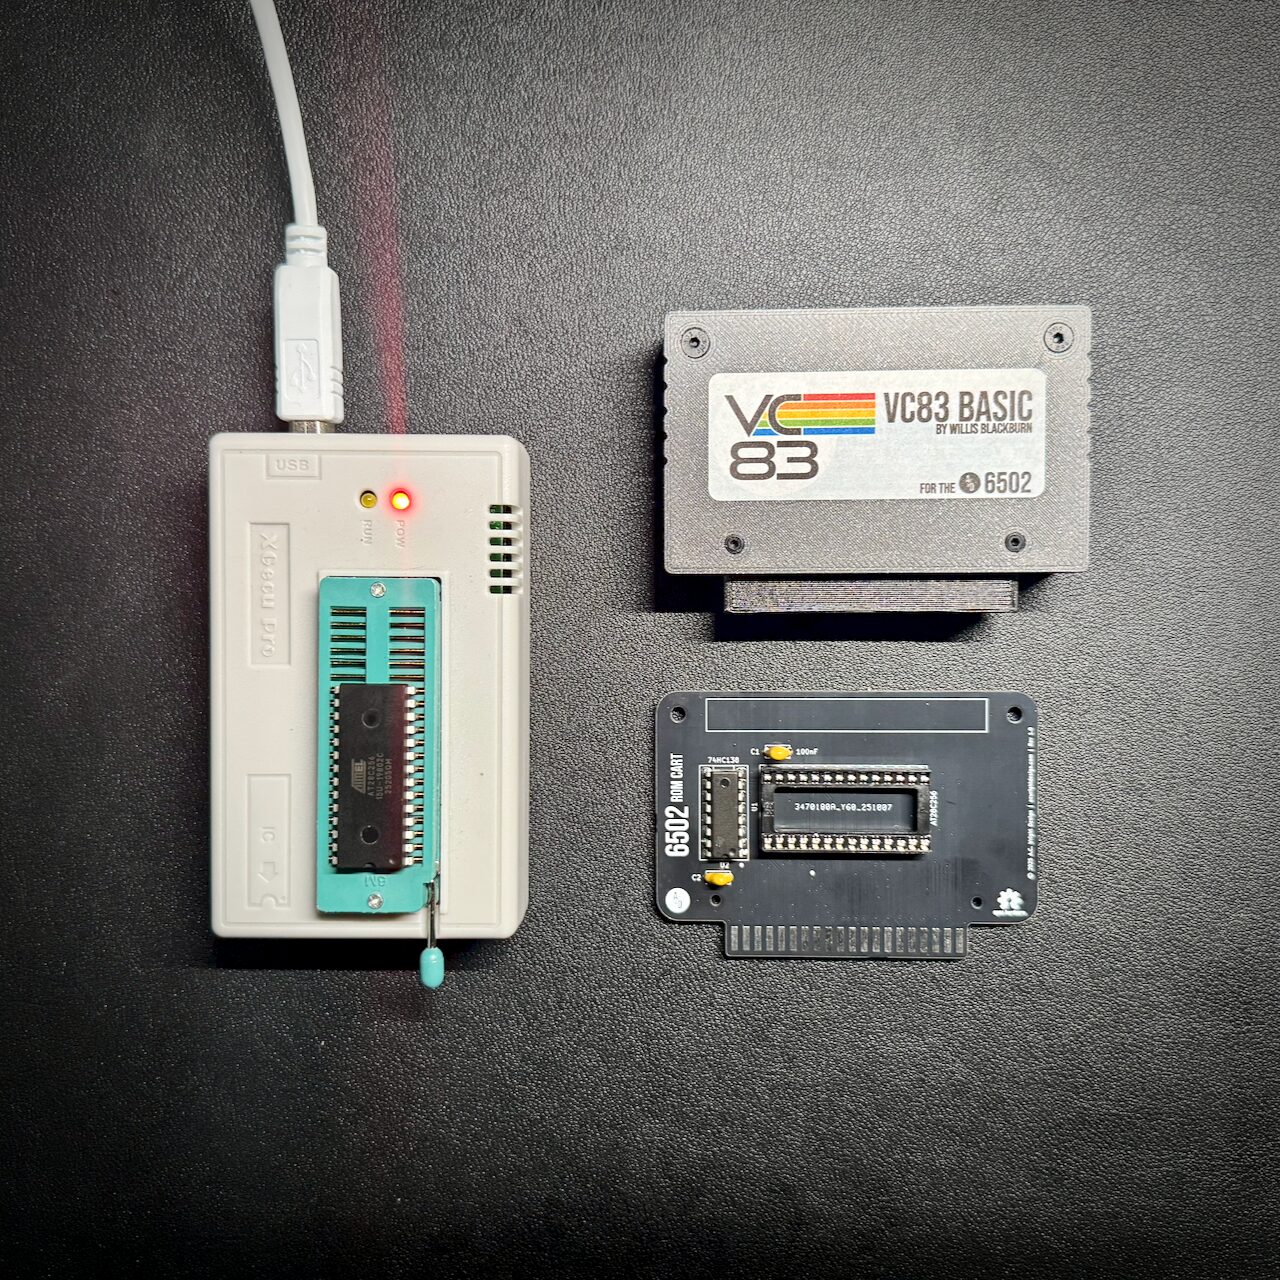
This is the ROM cart: one 28C256 EEPROM in a socket, pulled out to be burnt and put back. A Flash Cart is programmed differently and has its own section below.
A cartridge is a 32 KB image for an AT28C256 EEPROM, and make in the 6502-CRT template produces one:
cl65 -t none -C 6502.cfg -l Cart.lst -o Cart.crt Cart.asmTry it first — this costs nothing and catches everything except a bad chip:
6502 run --cart Cart.crtThen burn it:
minipro -p AT28C256 -w Cart.crtChip into the cartridge board, cartridge into the ACE, power on. The cartridge supplies the reset vector, so it boots straight into your program with no splash and no BASIC.
Why the image is 32 KB when the cartridge is 16 KB
The chip is 32 KB and the machine only reads its top half — the cartridge appears at $C000–$FFFF. The build pads the unused lower half with zeroes so the file matches the chip, which is what the programmer expects. The linker config is where that padding is set up.
Programming a Flash Cart
A Flash Cart cannot be burnt the way a ROM cart is. There is no chip to take out — the flash is a surface-mount part soldered to the board — so it is programmed in circuit instead, through the card edge.
The programmer is the Flash Helper: an Arduino Mega 2560 with a shield on it that carries one card-edge connector, the same connector the VCS Main Board uses for its cartridge slot. The cart plugs into the shield, the Mega plugs into your computer over USB, and a command line tool called 6502-flash drives the whole thing from your end.
Where the Helper and 6502-flash come from
Both the Flash Cart and the Flash Helper are part of the 6502-VCS repository, which is where the VCS's own boards live. Three directories matter:
| In 6502-VCS | What it is |
|---|---|
Hardware/Flash Cart/ | The cartridge board itself — schematic, layout and a DESIGN.md covering the mapper and the programming sequences |
Hardware/Flash Helper/ | The programmer board. Two parts: an Arduino Mega 2560 R3 and one card-edge connector |
Firmware/FH Programmer/ | The sketch that runs on the Mega, and 6502-flash under its host/ directory |
Build and upload the sketch to the Mega once — it is a PlatformIO project, and its own README has the steps. Then install 6502-flash from host/, which needs Node 22 or later:
cd "Firmware/FH Programmer/host"
npm install
Everything below runs from there. --port picks the serial port, and if exactly one Arduino Mega is plugged in you can leave it off; with more than one, the tool lists them rather than guessing. 6502-flash ports prints the same list at any time.
Start by proving the cart is there and answering:
6502-flash idU1 $BF $B7 SST39SF040, 512 KB
U2 $FF $FF not fitted, or not answering
512 KB in total - a 512K cartThat command reads each chip's own identifier out of the chip itself. $FF $FF for U2 is what a one-chip cart looks like: nothing is fitted in that position, and the bus floats high when nothing drives it. $FF $FF for U1 means something different, because U1 is always fitted — a cart whose U1 does not answer is not responding at all, and the fault is in the board or the connector rather than in anything programming will fix.
Then write the image:
6502-flash program Game-512K.crt --verifyprogram erases the sectors it needs to, writes the image, and with --verify reads the whole cart back afterwards and compares it against the file. Even the largest cart is only a megabyte, so verifying costs about half a minute and is worth doing every time.
A smaller program in a bigger part goes on faster than you expect
The linker fills unused space with $FF, which is what an erased chip already holds, so program skips every sector that already matches. A four-bank cart in a 512 KB part is a few seconds rather than a minute and a half.
Putting an old cartridge on a Flash Cart
6502-flash layout takes a 32 KB ROM cart image and places it on a flash cart as the fixed region, so a game written before any of this existed runs from the new board:
6502-flash layout Game.crt -o Game-512K.crt --size 512KIt never overwrites its input, so the original 32 KB image is still there afterwards.
A legacy game that writes to $E000–$FFFF will change banks
On a ROM cart, a write anywhere in $C000–$FFFF goes nowhere — it is ROM, and a stray store is harmless. On a Flash Cart, a write in $E000–$FFFF latches the bank register.
Some games use a ROM address as a scratch write target, and some walk off the end of a table and store past its end. Either one worked by accident on a ROM cart. On a Flash Cart the same store selects a different bank, the window at $C000–$DFFF changes underneath the running program, and the program carries on reading whatever the newly selected bank happens to hold. Nothing reports any of this. If a converted game misbehaves in a way it never did as a ROM cart, look here first.
Saves never travel with the image
Keeping saves out of cartridge images is the point of the whole save design, so the rule is worth stating in full:
6502-flash program reads the .crt and nothing else. There is no flag that folds a save into what it writes, and no setting that makes one appear. Programming a cart puts the image on it and nothing more.
A save lives in a .sav file beside the image. Running a banked cartridge needs a newer emulator than this edition describes, so where those files come from is covered in the current edition's emulator chapter. The only route from a .sav back to a .crt is deliberate:
6502-flash merge Game-512K.crt Game-512K.sav -o Game-saved-512K.crtmerge writes a new file and refuses to overwrite either input. So the only way a save reaches a cartridge is that you asked for it, named the output, and programmed that one.
Onto somebody else's screen
There's a sixth destination, and it isn't hardware at all: a web page, where anyone with a browser can play your program without owning a machine or a card reader. It takes about six lines of HTML, and it lives with the rest of the emulator in Putting your program on the web.
Which to use
If you have a card reader, use the card: it's the least fiddly and it's how a finished program gets distributed anyway. Add a serial cable when you find yourself walking a card between two rooms. Keep bin2woz for the day you want to poke sixteen bytes into a machine that has nothing else attached.