

The KIM keypad
Three small boards turn an ACE into a machine built in the likeness of the KIM-1 — the 1976 single-board computer that taught a generation what a microprocessor was. Twenty-four keys, a two-line display, and nothing between you and the bytes.
A cousin, not a clone. It works the way a KIM-1 works — key an address, key the bytes, press run — but the ROM on the Keypad Card is the KC Monitor, written for this board, and not MOS Technology's. A listing out of a 1976 KIM-1 manual will not run here, and the keys are not where that manual says they are. What carries over is the way you program the thing, which is the part that was worth having.
The KIM runs BIOS 1.6
The KC Monitor was written for an ACE running BIOS 1.6, and the KIMulator on this page runs that BIOS under it. The Kernal calls, memory map and character set a keyed-in program works with are 1.6's, and the BIOS 1.6 edition of this guide is their reference. What this page says about the keypad itself holds either way.
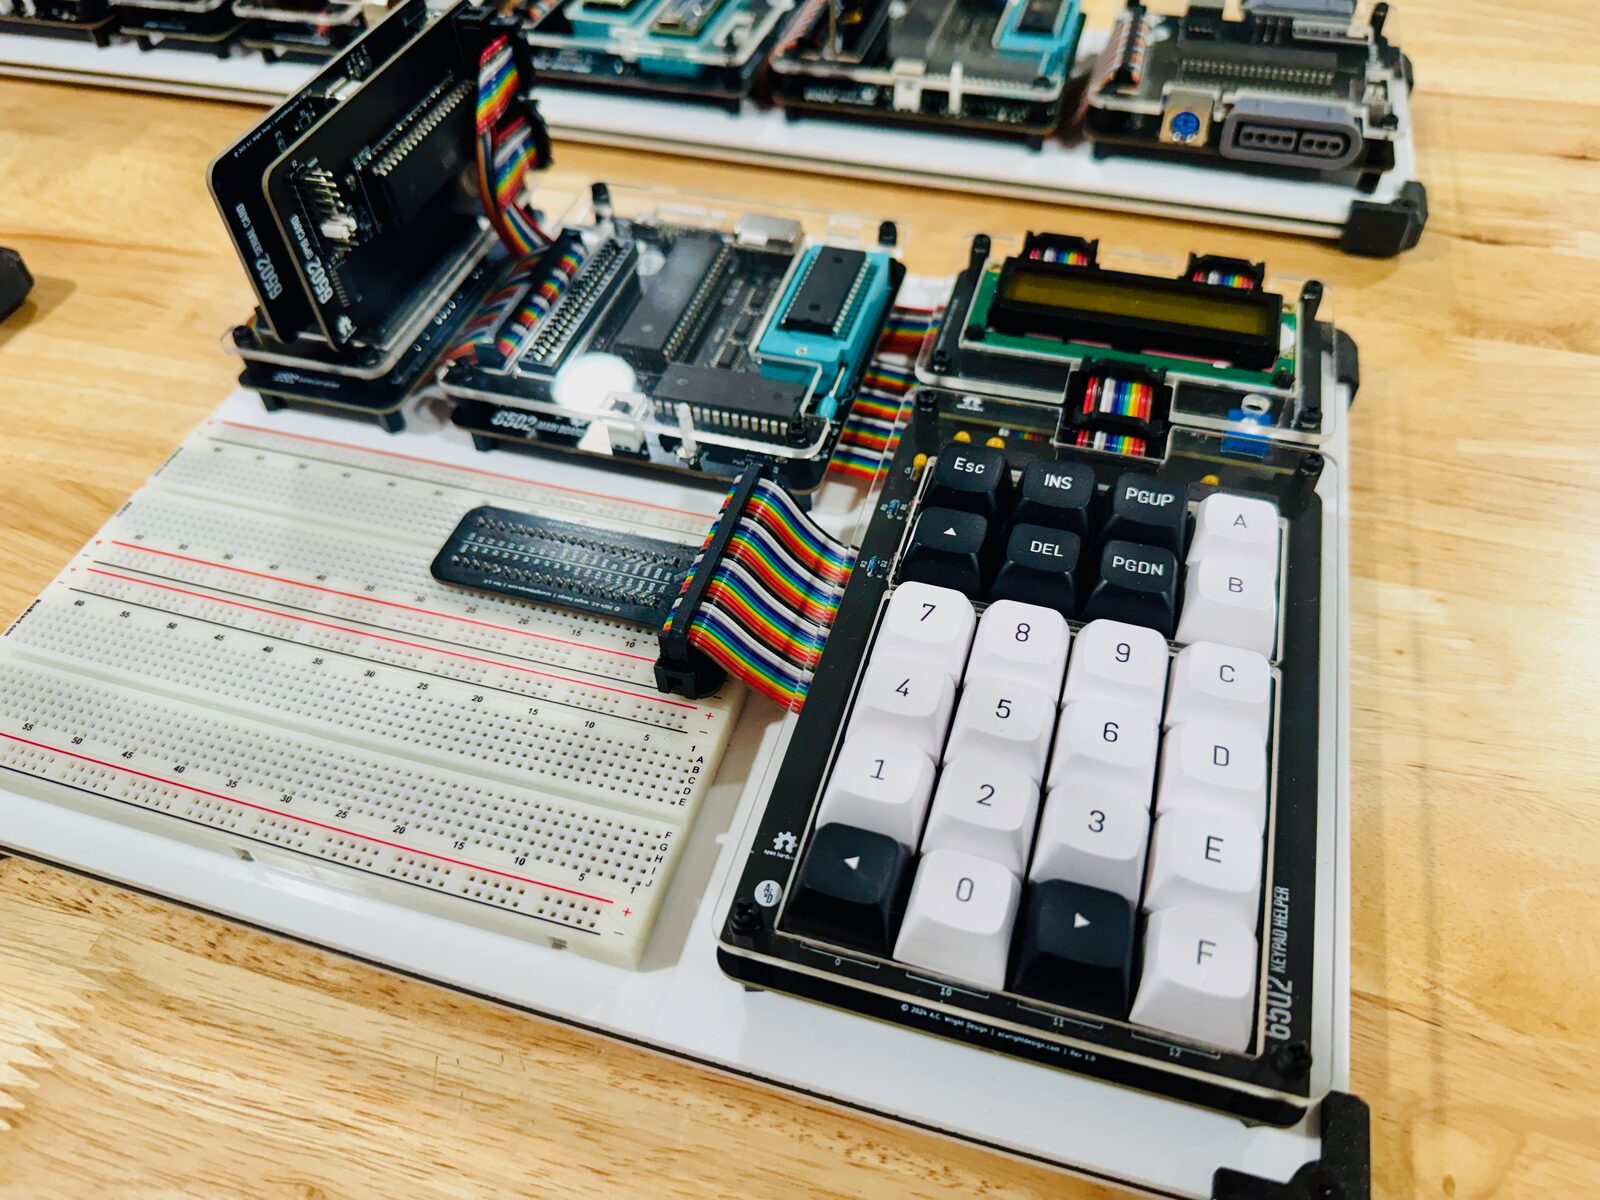
What you need
| Board | What it does |
|---|---|
| Keypad Card | Plugs into the ACE's cartridge slot. Carries the ROM and the chip that talks to the other two. |
| Keypad LCD Helper | The 16×2 display. Sits on the Keypad Card. |
| Keypad Helper | The 24 keys. Sits on the LCD Helper, or straight on the Keypad Card if you'd rather have no display. |
They stack. All three are in the 6502-KIM repository with schematics, board files and a bill of materials.
Plugging it in
Power off. Keypad Card into the cartridge slot, LCD Helper onto the Keypad Card, keypad onto the LCD Helper. Power on.
You won't get BASIC. The display comes up on --ESC TO START-- and holds there until you press ESC, which is the only key it takes. Then you're in the KC Monitor — an address on the left of the display, the byte at that address on the right, and a keypad that edits it. That's the whole interface, and it's the point.
To go back to being an ACE, pull the card out.
Why BASIC disappears
The Keypad Card doesn't sit politely in an I/O slot the way everything else in the family does — it takes over the top of the memory map. Its own ROM replaces BASIC, the Monitor and Wozmon, and it installs its own startup vectors, so the machine boots into the KC Monitor rather than into BASIC.
What it doesn't replace is the BIOS Kernal underneath, which stays exactly where it is and stays callable. Programs you write on the keypad can still ask the Kernal to print a character, read the clock, or talk to the serial port.
This takeover is also why the KIM has an emulator of its own rather than a setting in the ACE's. From the CPU's point of view it is a different machine, running different firmware, with a keypad and a two-line display where the video and the keyboard used to be.
Using the keypad
Sixteen of the keys are the hex digits 0–F. The other eight move you around and do things:
◄and►step back and forward one address.PGUPandPGDNdo the same thing in jumps of 256.INSswitches between reading memory and editing it. In edit mode, keying two hex digits writes a byte and►moves on.DELwrites$00at the address you're on.▲runs the code at the address on the display.ESCstarts the machine at the splash, and afterwards stops a running program and comes back to the monitor.
The hex keys do double duty: while you're navigating, each one you press shifts into the address a nibble at a time, KIM-1 style — key 0, 8, 0, 0 and you're looking at $0800.
So the loop is: key in an address, press INS, type your program two hex digits at a time, key the start address back in, press ▲. That's how programming worked in 1976, and doing it once will change how you think about the machine.
▲ runs your code as a subroutine, so an RTS at the end lands you back at the monitor with everything intact.
Two programs to type in
Both of these want eight LEDs at $9400 — the traditional first thing to build, and a row on a breadboard is perfect for it. The LEDs can't hang off the bus by themselves, though: something has to notice the write and hold the byte afterwards. That is all the demo circuit does. A 74HC138 picks $9400 out of the eight I/O slots, a couple of gates turn a write to it into a latch pulse, and a 74HC373 holds the byte on eight LEDs behind 330 Ω resistors. Four chips, a 2×20 header onto the bus, and an evening.
📐 LED demo schematic (PDF) — one page, every part and every bus pin. The KiCad project it was drawn in is in this site's repository if you'd rather change it than copy it.
Binary counter — counts 0 to 255 in binary on the LEDs, about twice a second, then rolls over and starts again. Eighteen bytes. Type-in card →
KITT scanner — one lit LED sweeps left and right across the row, like the front of the car in Knight Rider. Thirty-eight bytes, fourteen of which are a table of patterns rather than code. Type-in card →
Each card has the bytes laid out in a grid to key in, the assembly source they came from, and the steps to run them.
A KIM to key them into
You don't need the boards to try this, and you don't need the breadboard either. Here is a KIM with the LED circuit already on the bus at $9400:
Open a card in another tab and work down its grid: key 0800, press INS, then each byte followed by ►. INS again at the end, 0800 once more, and ▲. ESC brings you back.
Click the pad and your own keyboard works too — the number and letter keys are the hex digits, Esc, Insert, Delete, PgUp and PgDn are the keys they're named after, and the left, right and up arrows are ◄, ► and ▲. Eighteen bytes go in faster than you'd think.
The machine above shows one panel at a time, and the KIM / TERM / BAY switch in the bar underneath chooses which. KIM is the card — the display and the pad. TERM is the serial monitor described in the next section, on the same machine at the same time. BAY is whatever is on the bus, which here is the eight LEDs. Switching only changes what you are looking at: a program counting on the LEDs goes on counting while you watch the terminal.
The ⌨ button puts a keyboard on the screen for the terminal, and on a phone or tablet it opens by itself. A KIM has no keyboard of its own, so what you type there goes down the serial line rather than to the pad — it is the ACE's 67 keys standing in for a board on the other end of the cable, Shift and Ctrl sticky so a finger can reach them. The pad needs none of that: it is drawn at every size and takes a finger as it is.
There's a full version at https://acwright.github.io/6502-KIMULATOR/, wide enough on a desktop to stand all four panels beside each other with no switch, and a desktop application on its releases page that can load your own KC Monitor.bin and attach a real serial port.
The serial monitor
Fit a serial cable (Serial and a terminal) and the KC Monitor gives you a Wozmon-compatible monitor over it at the same time as the keypad — so you can examine and change memory from a laptop and from the keys at once. Handy when you're typing in something longer than a few bytes.
The commands are Wozmon's: 0800 shows the byte at an address, 0800.0810 a range, 0800: A9 41 deposits, and 0800 R runs the program there. That last one is a subroutine call, exactly as ▲ is on the pad, so a program ending in RTS comes back to a fresh > prompt with the machine still yours. The two consoles agree about what running a program means.
The terminal gets the same --ESC TO START-- splash, and Esc typed there does what ESC on the pad does: either one starts the machine, and both consoles come up together. The > prompt follows, so a prompt in the terminal means the monitor is reading you. Anything sent before that press is thrown away, so start the machine first and paste afterwards.
Building a KIM on its own
You don't have to start from an ACE. The KIM predates it, and the original recipe is a stack of COB cards:
- Backplane (or Backplane Pro) + CPU Card + Memory Card, or the Main Board from the VCS project in place of all three
- Backplane Helper and, usually, a Serial Card
- The same three keypad boards above
That build is a KIM and nothing else — no video, no sound, no BASIC. It's a lovely object and a genuinely good way to learn the 65C02. The full parts list and the wiring are in the 6502-KIM repository; the cards it needs come from COB.
📄 6502-KIM card — the boards, the overlay and the pad, on two printable pages. The Keypad Mapping card has all twenty-four keycodes; the keypad map explains them.