
The ACE on a PicoCalc
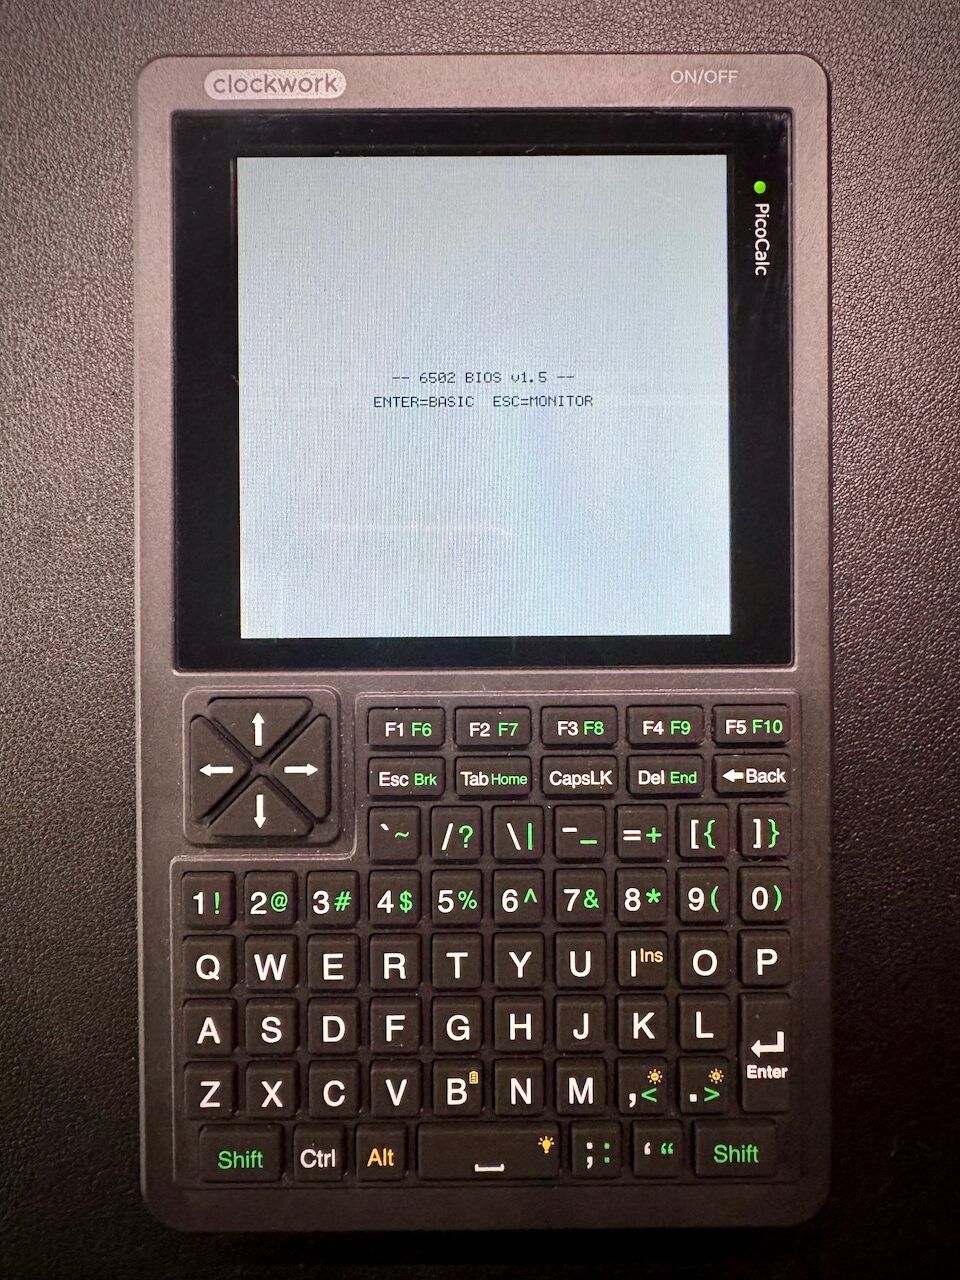
The PicoCalc is a handheld: a keyboard, a square screen, a speaker, a battery, and a Raspberry Pi Pico inside it that you can put your own firmware on. Put this firmware on it and the handheld is an ACE — the same ROM, the same BASIC, the same Monitor, the same cards answering in the same slots.
The PicoCalc runs BIOS 1.6
The ACE this firmware turns the handheld into is the one with a TMS9918A video card, running BIOS 1.6: the splash, the Monitor, and the screen modes of that chip, rather than the 6502-PICOVDP and BIOS 2.0 the rest of this guide describes. For programming it, the reference is the BIOS 1.6 edition of this guide. This page is about the handheld, and holds either way.
It's a pocket machine rather than a program on a laptop. There's no operating system underneath and nothing to launch: one file goes onto the Pico, and from the moment you press the power button the 65C02 owns the screen, the keyboard and the sound.
What you need
- A PicoCalc, with the Pico module it came with. Both the Pico 1 and the Pico 2 work — the difference is how much banked RAM you get.
- An SD card, formatted FAT32. This is where programs, cartridges and the memory card live.
- The firmware, from the 6502-PICOCALC releases page. There's one file per board; take the one that matches yours.
Putting it on
- Unplug the Pico, hold its BOOTSEL button, and plug it back in.
- It appears on your computer as a USB drive.
- Copy the firmware file onto it. The board reboots into it by itself.
That's the whole installation. It replaces whatever was on the Pico, and putting the original firmware back is the same three steps with a different file — nothing is burned in.
Take the file that matches the board
A Pico 1 and a Pico 2 need different builds and won't take each other's — the file ending -pico.uf2 is the first, -pico2.uf2 the second. If you're not sure which board is in front of you, look at the drive that appears in step 2: RPI-RP2 is a Pico 1, RP2350 is a Pico 2.
The first time
Press the PicoCalc's power button. You get the splash, the two-line menu, and then BASIC, exactly as on any other machine in this guide — with one difference worth knowing about the first time: it takes a while. Where hardware is at the OK prompt in about five seconds, a Pico 1 takes something like thirty. It's emulating a whole computer on a microcontroller, and that is the price.
The machine also looks after the SD card for you. On the first boot it makes the three folders it wants and the memory card image it works against:
/Programs     programs to load into memory
/Carts        cartridge images
/ROMs         replacement ROMs
/CF.IMG       the memory card
If you power the Pico from its own USB port
The screen, the keyboard and the SD slot only come alive when the PicoCalc's power button is pressed. Power the Pico module directly instead — for the serial console, say — and it starts running several seconds before the rest of the handheld exists. It waits for the keyboard to answer before it touches the SD card, so this sorts itself out; if nothing ever answers it gives up after five seconds and boots anyway, which is what lets a bare Pico with no PicoCalc attached still run.
Typing on it
The PicoCalc's keyboard is the ACE's keyboard. Everything you type arrives in capitals, because that is all the machine's own keyboard has ever sent, and Ctrl makes the control codes it always did — Ctrl+C stops a program, and the rest are in The keyboard.
The arrow pad is the four cursor keys. Del and Ins are the keys of those names. The keys an ACE has never had — the function row, CapsLk, Home, End, Tab, Brk — do nothing, apart from F1, which is the launcher below.
There are no joystick ports on a handheld, so eight keys stand in for stick 1:
| Key | Stick |
|---|---|
| Arrow pad | Up, down, left, right |
| Space | Fire |
| Z X C | The three other buttons |
JOY(1) reads them as it reads a real stick, so a game written for one plays here — right hand on the pad, left hand on the buttons. Nothing drives stick 2, which reads as untouched. Sticks and keys is where the rest of that is.
The memory card
CF.IMG on the SD card is the machine's memory card. DIR, LOAD, SAVE and BLOAD/BSAVE all work against it, and what you save is still there after the battery runs out. Storage covers all of it; nothing about it is particular to the handheld.
It starts one megabyte long and grows a megabyte at a time as you use higher disk numbers, rather than sitting on the SD card as a quarter of a gigabyte of mostly nothing. You can also build a card image on a computer with cffs and drop it in as CF.IMG.
One thing to expect: long file names are shortened, so Space Invaders.bas on the SD card appears in the launcher as SPACEI~1.BAS. It loads perfectly well under that name. Files inside the memory card image are unaffected — those are the machine's own eight-character names.
The launcher
F1 opens the launcher, at any time. It runs outside the emulated machine, so it opens even if a cartridge has locked the 6502 up solid — which makes it the way out of anything.
| Item | What it does |
|---|---|
| Load program | Puts a .bas or .prg from /Programs into memory. Type RUN. |
| Load cartridge | Fits a cartridge image from /Carts and restarts the machine into it |
| Load ROM | Replaces the built-in ROM with one from /ROMs |
| Eject cartridge | Takes the cartridge back out |
| Restore built-in BIOS | Puts the machine's own ROM back |
| Settings | The screen below |
| Reset machine | The reset button. Memory survives, so a BASIC program can be RUN again. |
| Power cycle | The cold start. Memory is cleared and BASIC comes up fresh. |
| Resume | Back to whatever was running |
Arrows move, Enter selects, Esc goes back.
A program loads straight into memory and leaves everything else alone. A cartridge or a ROM is a chip swap, so the machine restarts to pick it up — and both stay put when the handheld is switched off, the way a chip in a socket would.
Settings
Also under F1, and remembered between sessions. Left/Right change the highlighted line.
| Setting | What it does |
|---|---|
| Clock speed | Stock, or 200 MHz for a faster machine. Takes effect at the next power-on. |
| Expansion RAM | How many banks of banked RAM are fitted |
| Backlight | Brightness, applied as you turn it |
| Sleep after | Blanks the backlight after an idle spell; any key brings it back |
Sleep is a dark screen and nothing more — the 6502 carries on, a tune keeps playing, and a serial terminal stays connected. It's a battery saver, not a pause.
The two Picos
Both boards boot the same machine. What differs is how much memory is left over for the banked RAM cards after the machine itself has taken what it needs:
| Pico 1 | Pico 2 | |
|---|---|---|
| Banked RAM | 16 banks — 16 KB | 256 banks — 256 KB |
The ROM checks what's fitted when it starts, so both come up correctly and MEM reports what it found. BASIC only ever uses bank 0, which is in the machine's own 32 KB, so a BASIC program can't tell the two apart.
The serial port
The machine's serial port comes out in two places at once: over USB from the Pico, and on the pins of the PicoCalc's side header. Open either at 19200 8-N-1 and you have the same terminal described in Serial and a terminal — a console when the machine has no screen yet, XModem transfers, and a second window onto the Monitor.
Two places it isn't the real thing
The 6502 isn't paced to a fixed clock here; it runs as fast as the board manages, which is slower than a real machine and not exactly steady. Anything that counts on instruction timing rather than on the clock will notice.
The video chip's fifth-sprite and collision flags always read as clear, because the picture is drawn on the other processor core from the one running the program. Sprites still show and still move; what you can't do is ask the chip whether two of them touched. Nothing in BASIC, the Monitor or the ROM uses either.
Where it comes from
The firmware, the source and the build instructions are in the 6502-PICOCALC repository. It's the same machine as the emulator — the cards were written against it — so a program that runs in one runs in the other.